
I asked around so many people, so many times that I finally decided to take the matters into my own hands and so I came up with the sollution to curve your text on Instagram pictures. Or any other pictures!
But I was keen on doing so for my social media accounts as I recently – as some of you may already know – gave into my nail polish obsession and joined the Happy Nail Polish community. A joyful society of ladies talking about polish and glitter all day long. Sharing pictures of newly polished nails is a must and since we all want to enter the web-ternity of nail polishers, watermark our pictures we must! This is how watermarks look like (on yours truly nails):
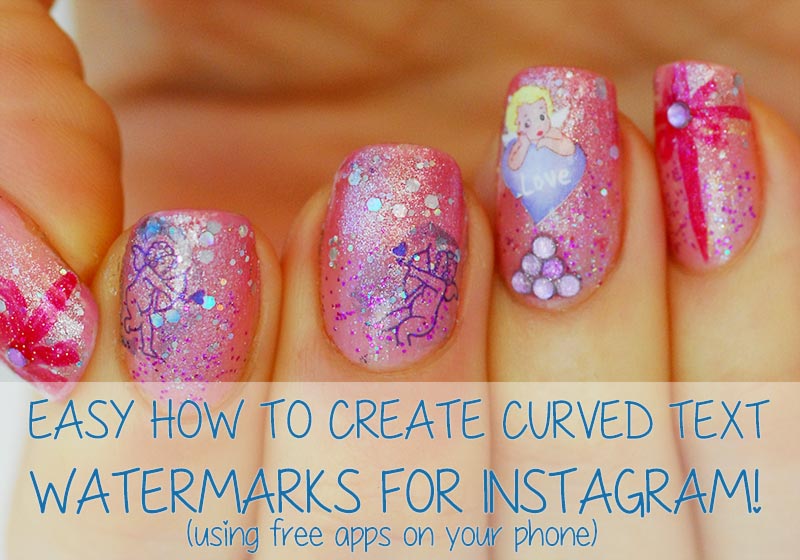
A watermarked image is like a copyrighted one. It’s like saying ‘hey, these nails are mine, better spread the word and share the awesome pic!’. And since practice makes better, and more refined, such is the case for watermarks. Which, in the nail polish community equals – unlike many other beauty places – the curvier, the better! Curved watermarks around that one, most special accent nail of all five/ten:

have you seen the curved watermark around the pink glitter accent nail? isn’t that curved text wonderful?
See also: Fabulous Red Carpet nails!
I share my pics on social media (mainly Instagram) through my mobile phone. Which operates with Android (I’m not giving names, but clearly enough, it’s not an iPhone). Needn’t worry, iPhone users, these apps are generally available for iOS as well. And these are the apps I use to curve the text on my pics, as I searched and found them via my mobile phone’s Play Store.
PicsArt (free phone app)
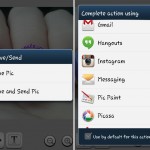
I’ve tried many camera apps but this one feels more user-friendly for me. It has many more features than the curving text – as you can see on the screen cap below – but I will concentrate on the watermark for the moment. So when you open the app, this is the welcoming screen. Choose ‘Photo’ if you already have the pic in your gallery. If not, choose ‘Camera’ and you’ll see how simple it is! Next you’ll get the size question, like below (the first case was always pre-selected in my case and didn’t change it so far, so click ‘OK’ and the ‘Choose Pic’ pop-up screen appears where you choose what suits you – I chose Gallery for I already had the picture saved on my phone)

from left to right, the first 3 screens in PicsArt, as detailed above
Ta-daah! These are my nails! Under the picture there are the filters available in PicsArt which are really amazing! So choose one that you like and then click done on the little v in the upper right corner! (My pic is filter-free, just out of the camera, taken in my car while waiting outside the school. Mommy duty). So once you’re done with filtering, choose the ‘Draw’ section from underneath the picture.
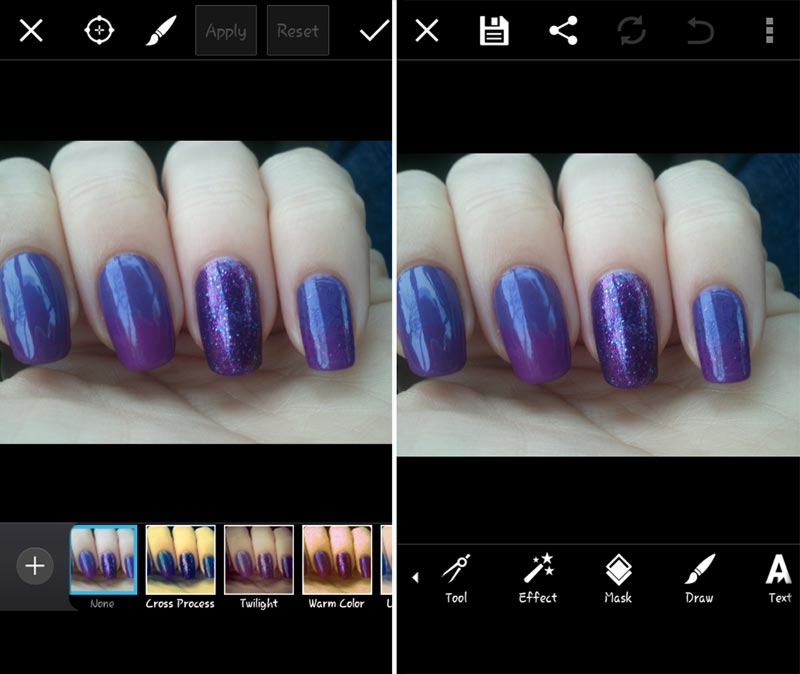
filtering your image (left) and getting ready to ‘Draw’ (right)
This first screen (far left) is basically useless save for the ‘A’. Select it! The following screen is where you introduce the text you want – usually the Instagram anchor or IG username, your blog or Facebook page. You can select whichever font you like from the ones below, the size and the fill color. I wrote ‘favnails.com’, change the default black fill with that purple color and the first font type from the second row, left to right. Once you’ve decided all that, click the little ‘v’ on the right upper corner.
choosing the font and the color you want for your watermark text
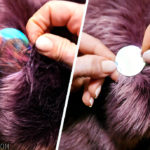
You’re back on the picture screen. Now all you need is draw a path with your finger on the screen, where you want your writing to be! Your Heaven-sent curved watermark, just above the nail! No worries if you don’t get it right the first time, the undo option on top of the picture, the arrow pointing back will save your each end every emotional trembled finger! Once you get your satisfactory result, click the v in the upper right corner and the app will get you through the saving/sharing process like a walk in the park!
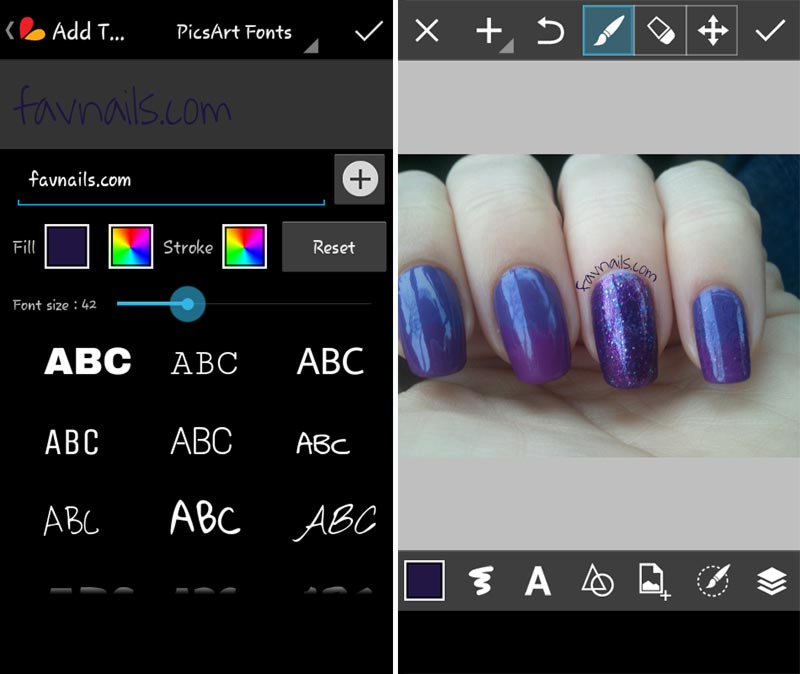
now you’re all set! Just draw with your finger on the screen and your text will follow the path indicated!
See more: Nails tutorials for catwalk nails!
PicPaint free phone app
Is the safety net, if you will, of all curved watermarks! So this is the startup screen. Choose what suits you. I went with ‘Use Existing Pic’ as I always take my pictures with PicsArt. Choose the picture you want from the Gallery.
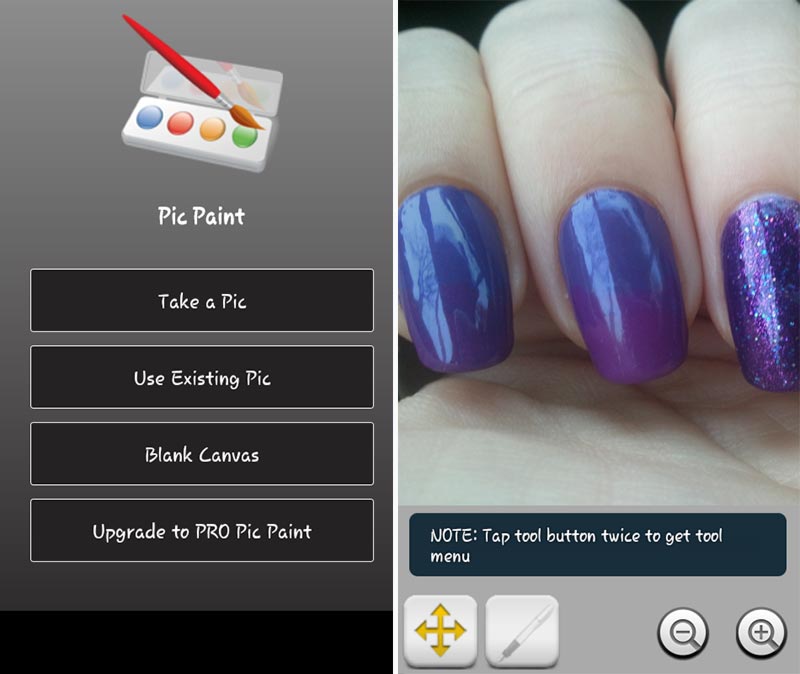
the app opens with a pretty explicit menu and just a couple of simple options
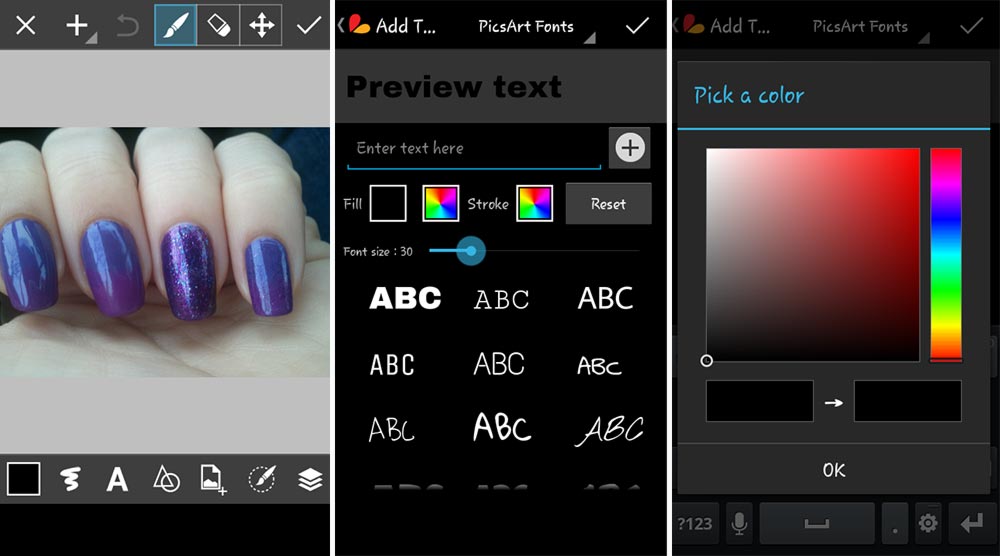
See? Just 4 simple options! You’ll only use two! Follow the instructions written on the screen and the options screen appears. I chose ‘Text’.
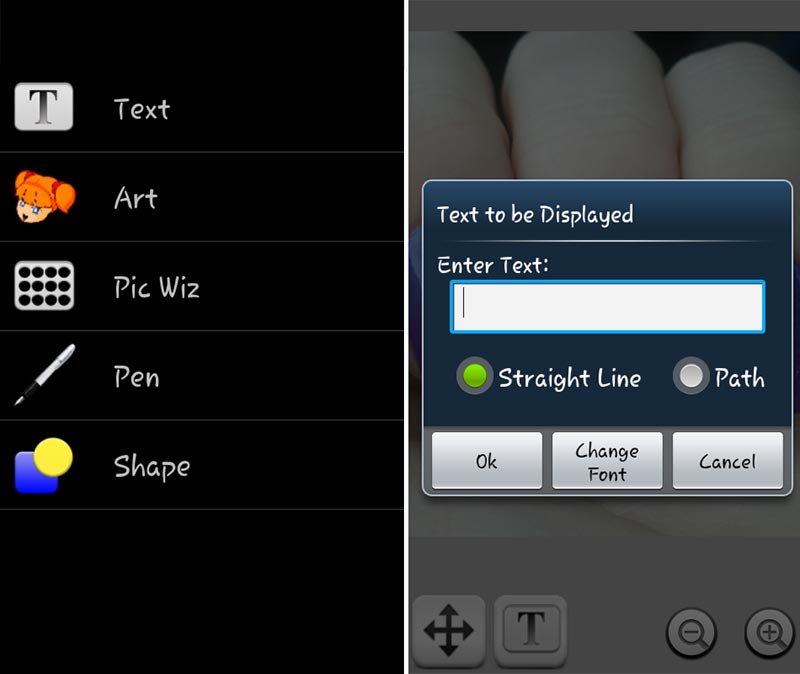
by choosing ‘Text’ (left), this little popup case appears where you can write your desired text
How simple is that? So after you enter the text, you select ‘Path’ and ‘Change Font’. Not many fonts available there so not much time lost trying font after font. I honestly went with ‘Sans Serif’. You can even change the color and the stroke. Please consider changing the ‘Transparency’ as well: 255 may look too rough on your picture while a softer, see-through text will allow your followers to see something else other than the writing!
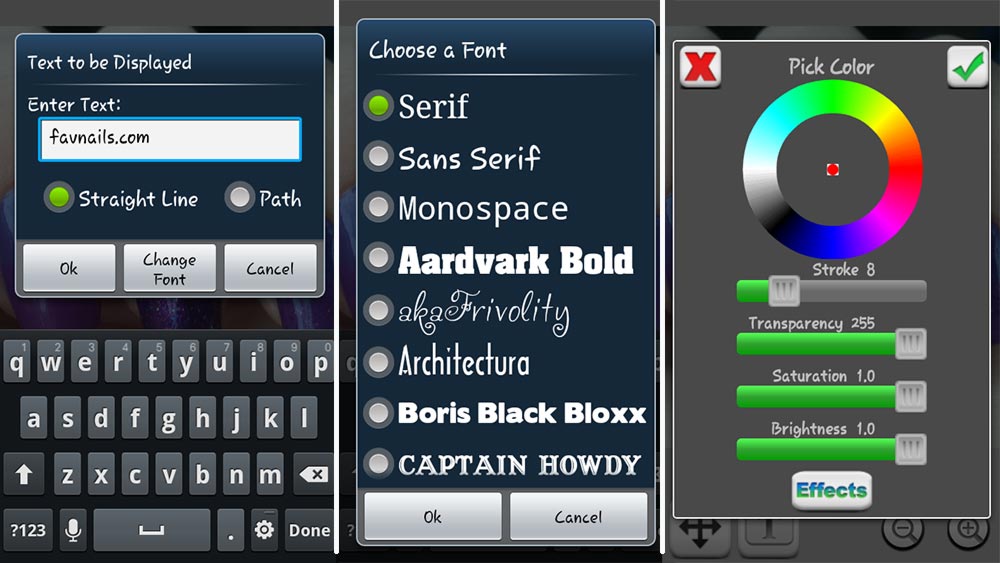
you can easily customize the text by choosing a font of your liking and a color from a colors diagram
Now you’re back on the main pic screen. Guess what? draw a path with your finger on the screen, exactly where you want your watermark to be! And: magic! Isn’t this pretty? Follow the instruction on the screen after you select ‘Save/Send’ and you’re set!

now that you’ve selected the font, size and color, make sure you also select ‘Path’ (left) and draw on the screen where you want your watermark text to appear!
Welcome to the Curved Watermark Heaven! All the pictures included here were taken by me (as my nails obsessed alter ego ‘favnails.com‘).

now all you have to do is save and share your newly curved watermark picture!
See also: Simple tips for healthy gorgeous nails!
Please note that none of the above mentioned apps didn’t suggest me to do this piece and it’s literally my first tutorial of the genre. It was so scary, it took me a week to start writing it. And two days to complete it. Hopefully it will help you find peace of mind: curved is beautiful!
![]()
and another curved watermark around the chevron accent nail – how lovely it looks?


")


17 comments
this is really helpful! thanks for answering this question for me ! <3
after a lot of headache.. I found this! thank you!
Incredibly useful, thanks!
I have been wondering how to do that for a while.. Thanks for this tutorial
Aww! You’re welcome ladies, I’m happy you found it helpful! <3
hi there, thanks for leaving a comment on my page !!! (step by step nail arts made super easy)
lovely tutorial , you did a great job and i hope it helps everyone who would like to use them …
please take some time and check my page too and i hope to see you there too :)
Sure thing, Camelia! Thank you for all the nice words, count on me! <3
Thank you SO much for sharing how to do this! Just did my first one using PicsArt and I love it! 💓
I’m so happy you found it useful Jennifer ! <3
So helpful Glad I found your website thanks so much
Thank you Laura! So happy I could help! <3
Thank you so much! Your tutorial is AMAZEBALLS!!! I’ve been trying to figure out for the longest how to do this.
So good to know it helped, Cassandra!
I am really happy that you did this! I have a nail account on Instagram (I am missnailitall) and I have been waiting to find how to put a water mark above my cuticle line😊 Thanks
So I just downloaded picsart but the current version seems to be different, and I can’t for the life of me find a way to bend the text along a path! Does it still work for you?
THANK YOU for your recommendation!!! I downloaded the app and LOVE IT!!! It was EXACTLY what I was looking for!!! ❤😙❤
I’m so happy I could help! Thank you for your sweet words!
Leave a Comment