

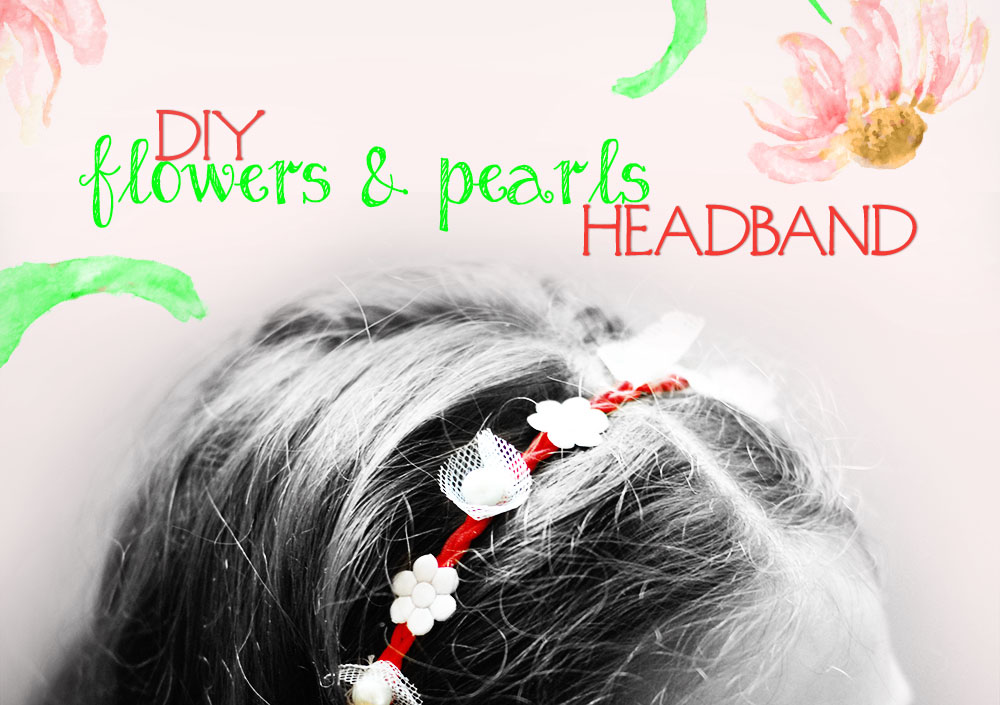
First day of Spring! This is yet! What better way to mark this moment than with a simple, yet beautiful and versatile flowery headband which can be worn I a multitude of occasions by both young girls and women alike! Even if you’re not the headband type, scroll down and look at the pictures, maybe some idea will pop up and you can find the right accessory inspiration for you!
I was commissioned by my sweet daughter to make a handful of headbands for her dance class girls (and for her, biensur) so I happily squeezed some time between the green peas and the chocolate & raisins baguettes to plug in the glue gun and roll some tulle flowers!
What? Green peas and pearls go so well together! They don’t? Well, they do in my household! Where we believe that a DIY a day will keep the doctor away! Now back to the headbands before I start telling you what movies I watched lately and how my heart skipped a beat when I picked up my girl from school with both her knees blooded and carefully doctored! (shivering) – no! back to the headbands!
See also: How to DIY the Chanel Couture Knit Cap for less!
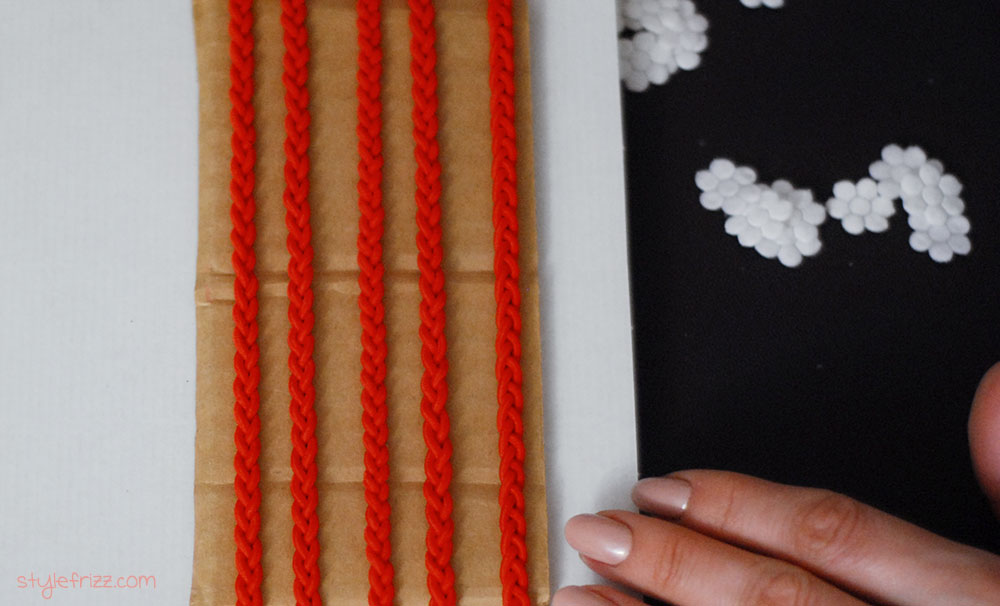
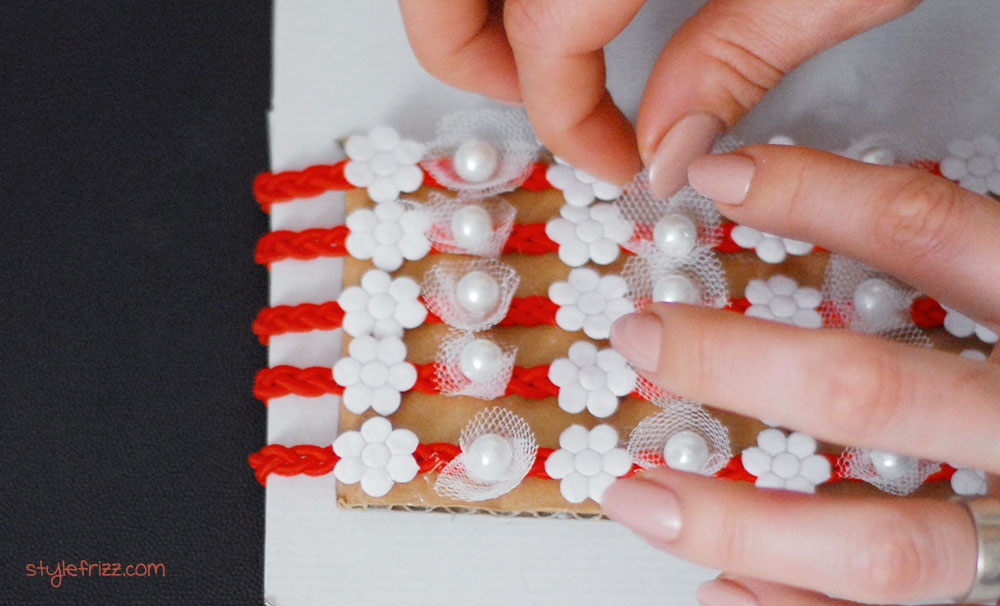
So I had these red braided elastics all simple, just waiting to be embellished! I had some white tulle leftovers and a white pearls (faux) necklace ready to be torn apart and transformed into many, many magic DIY projects! The tiny white fabric flowers come from a friend who knows I have a soft spot for all things do-it-yourself and she thought I might find good use for the flowers ribbon. I did!
I cut each flower carefully and prepped for gluing. I cut irregular rounds of white tulle, a round for a pearl and I wrapped all my elastics around a piece of cardboard. Ok. Two. The white cardboard is so pretty and shiny, I didn’t want to mess it up – who knows what I can use it for? With all my accessories numbered and prepped, I reached for my glue gun!

See also: How to DIY Spring Flowers Crown on a budget!
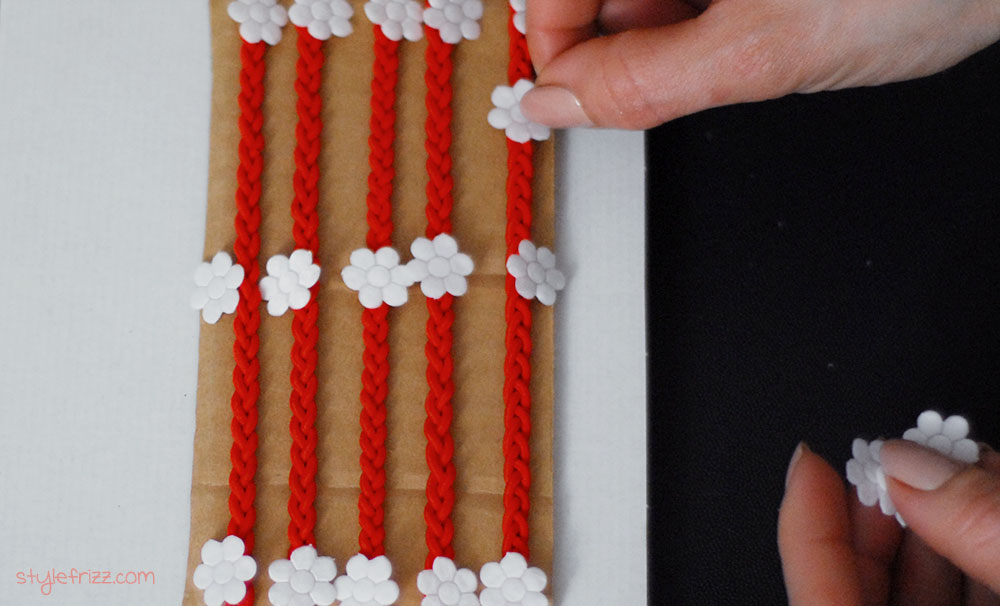
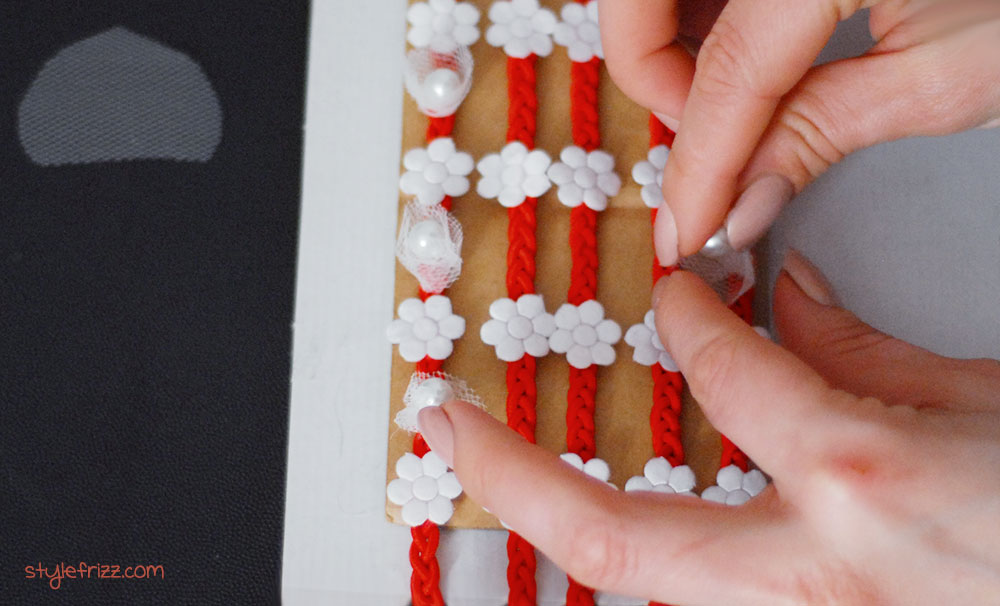
I glued all the tiny white flowers – 5 for every headband and started shaping the tiny tulle flowers with the pearls inside. If you have a particular mani you don’t want to mess up, don’t start this project! It was a pain to keep the silicone away from my nails and fingers! But I did. And just when I thought I was nearly done, I realized… I counted wrong. I was short for 4 pearls and 4 tulle rounds. Yayyyy! Glue gun out!
Scissors in!
Cutting, gluing ,repeat. Don’t measure, don’t over count, it might mess up the adventure (wink), keep your fingers away from the really hot silicone and … ta-daaaah! Five headbands in five minutes! Now back to the raisins and chocolate bread! (all images and materials are my own, use them wisely and share your projects!)


")


3 comments
Pretty! : )
Awww…….you made them look like Dancing Queens, that’s so sweet. <3
Thank you, fine ladies!
They were very happy, snapping their headbands all over the place – something I hadn’t considered, though :-) snapping headbands! Soon the pearls started popping like popcorn :-)) Next time I’ll girl-proof my headbands! Gosh I thought I saw it all, I do headbands for years – now these will forever remain engraved in my memory as the ‘popcorn heabands’ :-)
Oh, and now they’re learning the “tarantella’ – have to find something Italian-looking for them to snap. Ahem. wear :-)
Leave a Comment