..or how to manage your manicure so you won’t end up like Mary Kate Olsen barefoot in LA because she was just given a manicure-pedicure.
Being a star is such a big deal that doing your own nails is out of the question! And from what we can see, flip flops are out of the question too!

Ever found yourself in a rush needing to be tip-top for an important appearance and find your nail polish all chipped off? I know I had!
Ever sat down for a good manicure and just a second after, with extreme care, your nail polish was perfectly painted on your beautiful nails, you absolutely had to answer the phone which was, conveniently, in your purse?
Ever wanted to let your nail polish dry and a minute later messed it all because the kids were just wrecking the kitchen?
After days and days of trying and sometimes succeeding, I finally get to have my nails done properly. By myself. I do confess, it’s only happening when the kids are asleep, but hey, who has time to go to a manicure? I sure don’t! If I have extra time, I’d rather spend it with you ;).
Anyway, here’s my idea of a successful “do it yourself” manicure:
1. First of all, you need to get all the ingredients at hand. Paper towels, nail polish remover, cotton pads, lime, nail polish (I suggest you get not one nail polish, but 3! A base coat to ensure the protection of your nail, a nail polish coat that is, in fact, your colored nail polish and third and the most important – the top coat to protect your perfect manicure!).
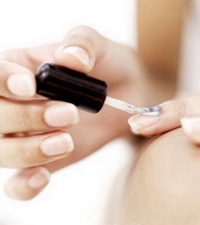
2. Now that you got all you need (including your phone/s near, a bottle of water and stylefrizz.com opened in front or your eyes) you may start with cleaning up your nails. I suggest you do it with a gentle acetone-free nail lacquer remover. The acetone, though effective, is well-known for damaging your nails.
3. After cleaning up your nails, some specialists suggest you put on some nail cream or take a hand bath with essentials oils. But as I said earlier, time is quite an issue for us, so let’s just skip the spa thing and get to business: it’s time to clean up your nails from those evergrowing cuticles. And I’m not saying to do so by cutting them! NO WAY! You just have to push them back towards the finger with your nails or teeth! Maybe this raises eyebrows, but it’s very effective, ask whoever you want, once you cut those nasty cuticles, they’ll keep growing back. If you just push them back to discipline them instead, it’s all going for the best!
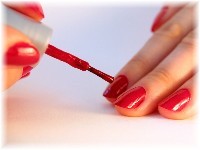
4. Now you’ve got a clean nail! Proceed in applying your first coat – the base coat. I suggest you choose a base coat coordinated with your nails. Meaning – a strengthener for weak nails, a whitener for yellow nails (need I say you gotta stop smoking?) etc. I’ve got a pink strengthener for example (yes, base coats come in shades too!). After applying your base coat, just wait until it’s dry (about 5 min, just enough time to read an interesting article on stylefrizz.com…).
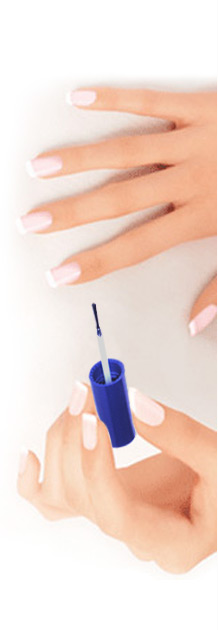
5. Once your base coat dried, you can apply your nail polish. Even if you’re going for a French manicure or a fancy colored one, your nail polish bottle needs to be rolled between your hands in order to homogenize. Don’t shake it, it will cause a storm of bubbles! After you rolled it, open the bottle and scrape some of the excess nail polish off. Paint one stripe in the middle of the nail then paint a stripe on the left and one to the right, so the nail polish will distribute evenly. You don’t have to put on extra nail polish, the coat has to be thin in order to create a quality manicure to last. Continue to do so for the other 9 nails (or 19 if you consider a pedicure).
6. If needed, you apply your second coat of nail polish (only if the color isn’t bright enough or if the nail polish wasn’t distributed evenly on the nail) then let it dry.
7. The last step and the most important is the top coat. I suggest you pick a top coat “wet look” but not necessarily a fast dry one. You apply it on your nails and let it dry so your manicure will remain perfect for a week.
I promise you a sequel guide to a proper manicure so you’ll become a professional in painting your own nails!






1 comment so far
wow! you make it look so simple and fun! i’m thinking about givin it a try!
Leave a Comment